
To optimize light distribution for even canopy growth, measure the canopy as a surface, align fixture placement with plant architecture, reduce large intensity gaps, and use training, spacing, and environmental control to keep productive tops in a similar light zone. More power isn’t the prize here. Usable light landing consistently across the crop is.
What Even Light Distribution Means
Even canopy growth happens when major growing tops receive reasonably similar conditions instead of a bright center and weak edges. A canopy can look green from above while still containing large differences in photon density, leaf temperature, air movement, and transpiration demand.
The goal isn’t mathematical perfection at every point. It’s to avoid extremes that force some tops to run too hard while others lag behind. When the plant response becomes uneven, compare the lighting pattern with the broader signs of healthy cannabis plant growth before assuming the fixture alone is responsible.
Start With the Shape of the Canopy
A neat light map can’t fully solve a canopy with wildly different heights. Tall tops push into a stronger zone while shaded interior growth stays farther from the fixture, so advanced light distribution begins with plant architecture: spacing, pruning, training, and the timing of stretch all affect what the light can reach.
If uneven height is the primary issue, canopy work may return more value than another light adjustment. When structure is creating the distribution problem, the site’s training and pruning resources are useful because they deal with the plant shape the light has to cover.
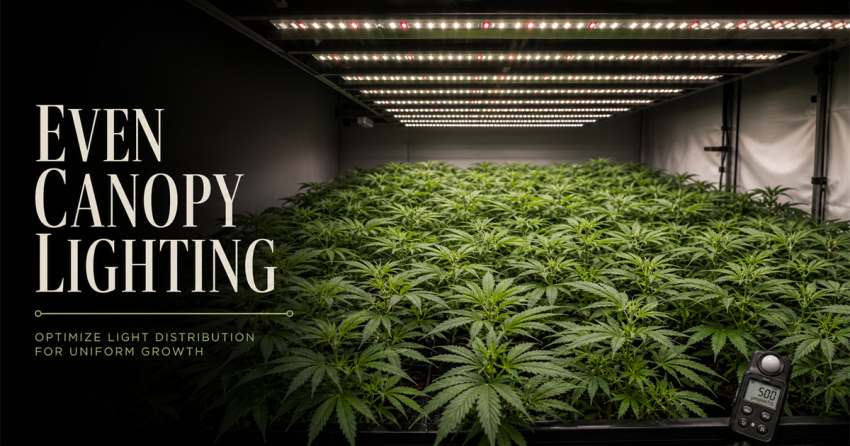
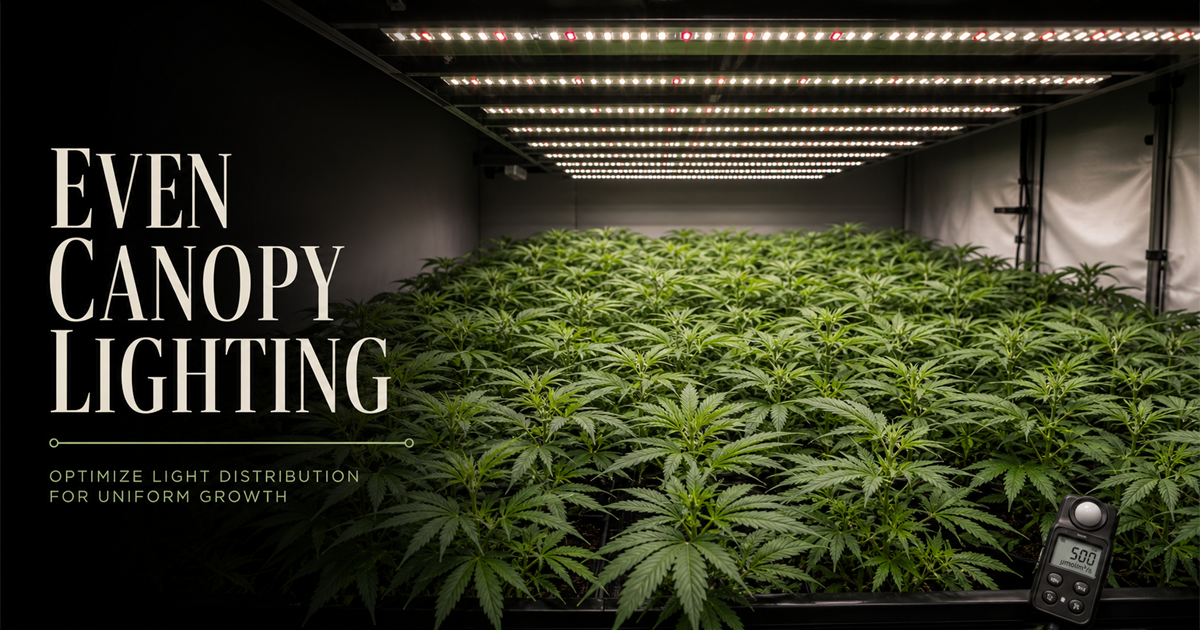
Map the Light Before You Change It
Anecdotal brightness isn’t enough for precision work. Measure or map canopy light at multiple points: center, corners, edges, and any zones where plant response differs. Record fixture height, dimming level, canopy height, and the environmental state at the time of measurement.
- Measure at canopy height, not just at one convenient point
- Compare center-to-edge spread
- Watch overlapping footprints from multiple fixtures
- Pair readings with plant behavior over time
The map matters because the fix depends on the pattern. A hot center points toward one set of choices. Weak boundaries point toward another: spacing, overlap, reflective management, or a different canopy footprint.
Fixture Height and Dimming Work Together
Lowering a fixture often increases intensity and can sharpen unevenness. Raising it may improve spread but reduce peak delivery unless output is adjusted. The right move depends on whether the crop needs more average light, less hotspot pressure, or a more uniform distribution at the same overall demand.
That is why fixture height and dimming should be treated as a paired control. Change one variable, re-map, observe plant response, and document the result. The fastest way to lose clarity is to change height, output, irrigation, and training all at once.
Use Overlap Intentionally
In multi-light rooms or tents, the strongest uniformity often comes from controlled overlap rather than isolated hotspots. Fixture footprints should blend across the canopy while still respecting heat, electrical, and environmental limits. Edge plants should not depend on a tiny sliver of useful light while center plants receive concentrated output from every direction.
Overlap can also create quiet trouble where fixtures meet. Those high-intensity seams deserve measurement, especially after height changes or canopy stretch.
Keep the Environment in the Lighting Conversation
Higher light demand only becomes productive when water movement, nutrition, leaf temperature, and gas exchange can support it. A canopy that receives better distribution may still grow unevenly if edge zones run cooler, airflow differs, or irrigation response varies across containers.
This is where lighting and heat management overlap. If a redistribution plan changes canopy temperature or room heat load, revisit the larger lighting and heat management picture instead of judging the light map in isolation.
A Practical Optimization Workflow
1. Define the productive canopy
Decide which tops and zones you’re actively trying to support. Do not optimize for weak lower growth that should have been managed through canopy strategy.
2. Measure the current spread
Map intensity at several canopy points and note where plant behavior agrees with the numbers. The map should identify hotspots, weak zones, and uneven overlap.
3. Correct architecture and spacing
Level obvious height differences, adjust spacing where plants crowd each other, and remove geometry problems that fixture tuning can’t fix.
4. Tune fixture controls
Adjust height, dimming, and overlap with one clear purpose at a time. After each meaningful change, re-check the canopy map and watch the crop for a response.
5. Re-evaluate after stretch or pruning
Canopies change. A good map before rapid growth can become outdated after tops rise, lateral branches fill space, or pruning changes light penetration.
Common Advanced Mistakes
- Chasing peak readings while ignoring edge performance
- Trying to solve plant-height problems only with light placement
- Changing too many variables before re-measuring
- Ignoring thermal and irrigation differences across the canopy
- Using reflective surfaces as a substitute for a coherent footprint
Bottom Line
Optimizing light distribution for even canopy growth means combining measurement with crop architecture. Build a canopy the light can actually cover, map the real spread, tune fixture height and output deliberately, and re-check the system as plants change. When the canopy is more uniform, the crop becomes easier to read and easier to steer with confidence.
2 thoughts on “How do I optimize light distribution for even canopy growth?”