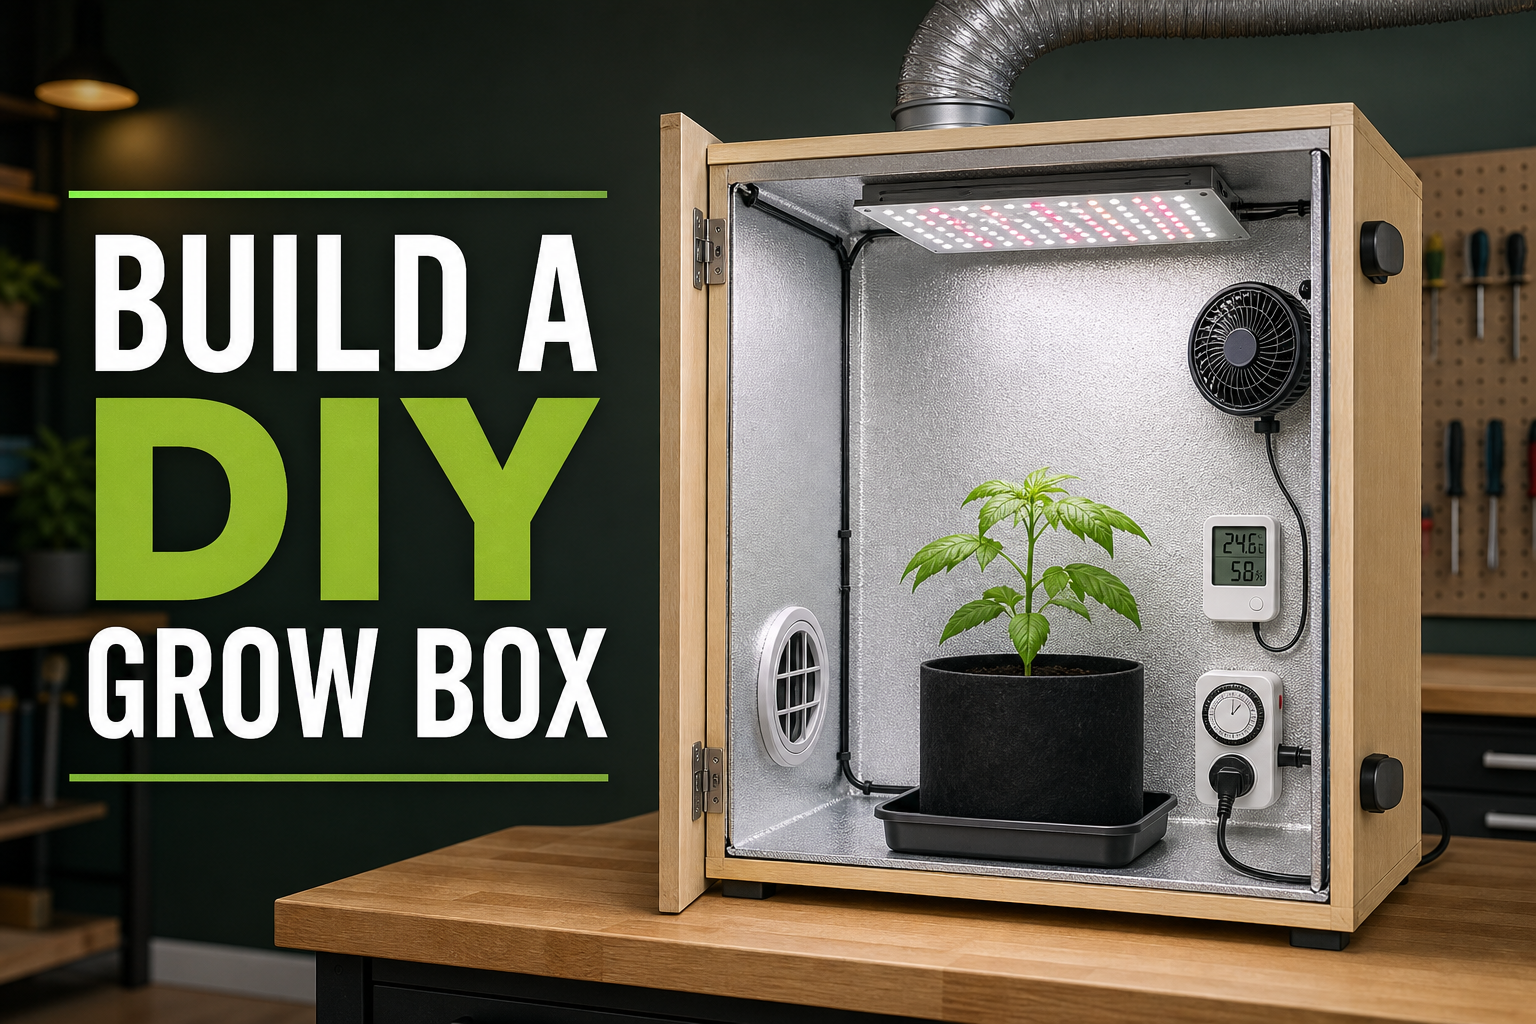
A DIY grow box for cannabis is a compact, enclosed growing space that combines reflective walls, an appropriately sized light, controlled airflow, and safe electrical management. Build the enclosure around the plant’s mature size and the equipment’s heat load, then test temperature, humidity, ventilation, light leaks, and electrical safety before placing a plant inside.
Plan the Grow Box Before Building
Start with the mature plant, not the empty cabinet. Measure the available floor area and height, then reserve vertical space for the container, drainage tray, light fixture, hanging hardware, safe light-to-canopy distance, and ventilation equipment.
A very short enclosure can become difficult to manage once the plant stretches during flowering. If height is limited, choose a compact cultivar and plan early cannabis plant training so the canopy stays below the light instead of forcing a mid-grow rebuild.
Materials and Equipment
A basic box usually needs:
- A sturdy, clean cabinet or framed enclosure
- Flat white, reflective, and fire-resistant interior surfaces
- A properly sized LED grow light with secure hanging hardware
- An exhaust fan and ducting
- A passive or powered intake opening
- A small circulation fan
- A thermometer and hygrometer
- A grounded timer and suitable power strip
- A waterproof drainage tray
- Weather stripping or other light-sealing material
- Fasteners, vent covers, and cable-routing hardware
Avoid highly flammable wall coverings, damaged extension cords, exposed wiring, and materials that release strong odors when heated. If the enclosure requires new mains wiring, have a qualified electrician do that portion rather than improvising it.
Build the Enclosure
1. Clean and seal the structure
Remove dust, oils, loose paint, and porous debris. Seal cracks that would leak light or admit pests, but don’t make the cabinet airtight because plants and equipment need continuous air exchange.
2. Finish the interior
Use a smooth, washable, reflective surface. Flat white paint is simple and diffuses light well, while horticultural reflective film can work when it’s secured flat. Wrinkled foil creates uneven reflection and is easy to damage, so it isn’t an ideal lining.
3. Cut intake and exhaust openings
Place the intake low, where cooler air can enter, and the exhaust high, where warm air accumulates. Protect openings with suitable screens and ensure duct bends don’t choke the fan’s rated airflow.
4. Install the light securely
Mount the fixture with hardware rated for more than its weight, and include a secondary safety support when practical. The fixture should be adjustable as the canopy grows. Follow the manufacturer’s clearance guidance and don’t let leaves touch the light.
5. Route power safely
Keep plugs, power strips, drivers, and cable connections above the floor and away from irrigation runoff. Use grounded, undamaged equipment and a GFCI-protected circuit where water is present. Don’t daisy-chain power strips or exceed the circuit’s capacity.
Size the Ventilation System
The exhaust fan must replace warm, humid air quickly enough to keep conditions stable. Calculate the box’s volume by multiplying length × width × height, then choose a fan that can exchange that volume while accounting for resistance from filters, duct length, and bends.
For example, a 2 × 2 × 4-foot box holds 16 cubic feet. A fan’s free-air rating may look generous, but its effective airflow drops when a carbon filter and narrow ducting are added. Watch the climate after the system is assembled, because the same airflow that removes heat also affects humidity in an indoor grow space.
Use the circulation fan to move air gently across and beneath the canopy. It shouldn’t blast one spot continuously or push the plant against a wall.
Control Light and Heat
Choose lighting by usable canopy area, fixture efficiency, and manufacturer-recommended coverage rather than by a vague watt-equivalent label. LED fixtures usually suit compact boxes because they produce less radiant heat than older high-intensity systems, but they still add heat that must be exhausted.
Keep drivers outside the box when the fixture allows it, and test the enclosure with the light and fans running for several hours. Measure conditions at canopy height, not only near the intake. If temperature continues climbing, improve ventilation or reduce the light’s power before introducing a plant.
Prevent Light Leaks
Photoperiod plants need a consistently dark period during flowering. Seal door edges with weather stripping and create light traps around vents so air can move without allowing a direct beam through the opening.
Stand outside the closed box in a dark room while the internal light is on, then repeat with the room light on and the box dark. Fix both outward and inward leaks, and check whether the fixture spreads light across the whole footprint; the guide to even canopy light distribution helps when the center is bright but the edges stay weak.
Run a Safety and Climate Test
Before planting, operate the complete box for at least a full light cycle and check:
- Maximum and minimum temperature
- Maximum and minimum relative humidity
- Air movement at the canopy and floor
- Fan noise, vibration, and secure mounting
- Hot plugs, cords, drivers, or wall surfaces
- Water containment and drainage access
- Timer operation and light leaks
- Easy access for watering, cleaning, and emergency shutoff
Never leave a new setup unattended until you’ve confirmed that the temperature stabilizes and every electrical component stays cool, dry, and secure.
Common DIY Grow Box Mistakes
- Building too short for the mature plant and light clearance
- Using a powerful light without enough exhaust capacity
- Placing electrical connections on the floor
- Making the box airtight instead of light-tight
- Using reflective material that wrinkles, tears, or creates hot spots
- Forgetting space for watering, pruning, and cleaning
- Relying on one temperature reading before the system reaches equilibrium
Bottom Line
A successful DIY grow box is a small environmental-control system, not just a cabinet with a lamp. Plan for mature plant height, use safe reflective materials, exhaust warm air from the top, bring cooler air in low, protect all electrical connections from water, and test the complete setup before growing. A modest box that runs safely and consistently will outperform a cramped, overpowered design that’s difficult to control.
1 response